EVOLUTION #
I will start where you might not expect me to start: a long time ago. Nothing in the natural world can be understood except in the light of evolution. For our native plants, we need to understand the effects that changing climatic and soil conditions could have had on the plants of those parts of Gondwana that were to become Australia.
Before 45 million years ago, when we were part of Gondwana, there was no gap between us or South America and Antarctica, so there was no circumpolar ocean circulation. The climate of Australia was subtropical and wet. Rainforest dominated the land. For millions of years, soils were constantly leached. This leaching gradually removed much of the phosphorus that had been in the volcanic rocks from which the soils had been formed.
Then we started to separate from Antarctica and head north. Over the next tens of millions of years, Australia gradually became drier. The plants had to adapt to lower rainfall, a more seasonal rainfall pattern and its increasingly erratic year-to-year variation. Fires caused by lightening added a further evolutionary pressure. Evolve, or perish!
In broad terms, Gondwanan plants had to adapt to low phosphorus supply, frequent drought, high summer temperatures, and fire. They had to develop ways of extracting phosphorus from soils that had little. Their leaves had to be able to survive drought: they became smaller, thicker and harder. To survive fire, they had to either develop seed capsules that protected their seeds until the fire had passed or they had to develop stem/trunk covers (bark) that resisted fire, plus the ability to grow again from epicormic buds.
ADAPTATION TO FIRE #
Those whose response to fire was to survive via their seeds are of particular interest to us here. A majority of our plants that grow outside coastal rainforests survive fire via their seeds. Typically, those seeds would have germinated with the first rains after fire. They would therefore have germinated in soil that had received a coating of ash from burnt vegetation. Ash is a rich source of a number of plant nutrients, particularly phosphorus, whose concentration in ash is many times that of the soil below. The young seedling is therefore exposed for a short time to an excellent supply of phosphorus. Also, the heating of the soil by the fire tends to change the organic matter in it so that its nitrogen is more available to plant roots.
The seedling gets a temporary hit of both phosphorus and nitrogen. After that? Not much. Extra nitrogen can come from that fixed by free-living soil bacteria, that fixed by the rhizobium bacteria on legume roots and the Frankia of casuarinas, that in rain during thunderstorms, and that provided through the decomposition of accumulating organic mulch. A bit of extra phosphorus will be extracted from the soil, but much of the phosphorus required for ongoing growth comes from recycling within the plant and from decomposition of organic mulch.
A main conclusion from this is that many of our native plants require some fertiliser nitrogen and phosphorus to be provided to them if their seeds are being germinated in something other than an ash bed. That is why in nurseries, we include some controlled-release fertiliser in the potting mix.
FERTILISER USE AT PLANTING #
But what about when a nursery-grown plant is planted into garden soil? Should we provide it with a bit more fertiliser to help it on its way? The answer to this question depends on what is already in your soil. The two key nutrients nitrogen and phosphorus will generally determine the growth of your plants.
Scenario 1. #
Soil disturbed by mining, earthmoving, building construction. It is mainly subsoil and, with luck, a bit of the original topsoil. It has a low organic matter content. Some extra fertiliser at planting is essential for all plants that are not sensitive to phosphorus. Very roughly, for a seedling that is to become a large tree, the amount of nitrogen could be 10 g and of phosphorus 3-5 g. That could come from 50 g of any controlled-release fertiliser that is labelled as being for roses, fruit trees, vegetables, whatever. They are all much the same. Use about 15 g for a shrub. Apply a mulch of composted organic matter. See the section below for guidelines for phosphorus-sensitive plants.
Scenario 2. #
Soil in a garden that has been a totally neglected weed patch for many years. You have no idea of its history. You do not know what has been added to it. There is some organic matter accumulation in the top part of the soil from decomposing weeds. A soil analysis would be of help here, but in its absence, I suggest that including some controlled-release fertiliser in the planting hole would be desirable. For plants that you know are not sensitive to phosphorus, use any controlled release fertiliser, as in Scenario 1. Use about 10 g for shrubs and 20 g for a tree seedling. Use the guidelines below for phosphorus-sensitive plants.
Scenario 3. #
Soil in a garden that has had much organic matter, including poultry manure pellets, added to it over many years. No fertiliser should be needed. Plants that are sensitive to phosphorus may not thrive or may die because there is too much phosphorus in the soil.
PHOSPHORUS-SENSITIVE NATIVE PLANTS #
It is not possible to give here an exhaustive list. The book Growing Media for Ornamental Plants and Turf (Handreck and Black, 4th ed, 2010, pp. 525-531) has an extensive list. General guidelines will have to do here.
 The following groups of plants are generally not sensitive to phosphorus: Myrtaceae, chenopods, plants from calcareous soils, plants from rainforests.
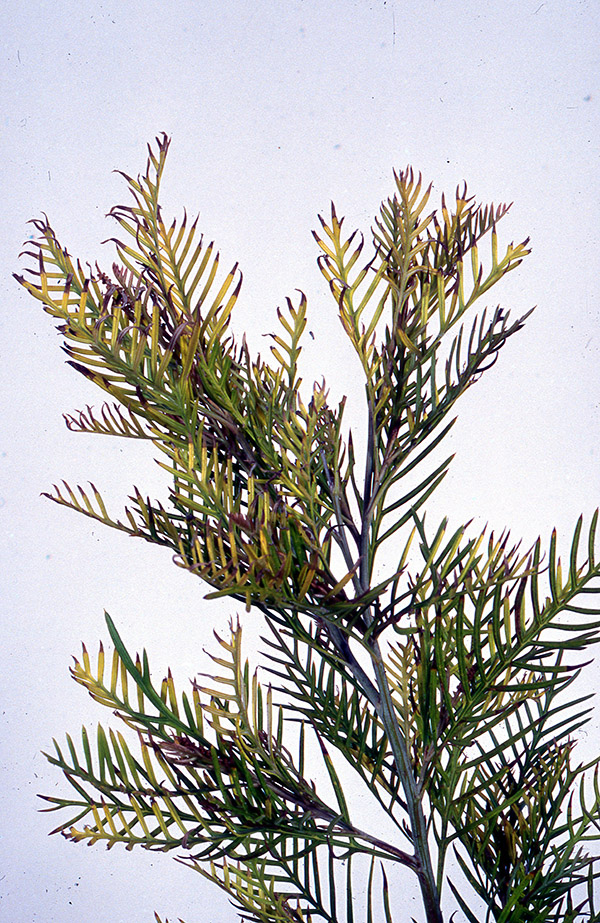
The following groups of plants contain many species that are sensitive: Proteaceae (grevilleas, banksias, hakeas, etc.); many pea-flower shrubs (Daviesia, Hardenbergia, Kennedia, etc.); perhaps half of all acacias; plants that evolved on soils that are naturally very low in phosphorus, such as the sands of SW WA, the sandstones of the Sydney area, coastal heathlands everywhere.
As you will often not know whether or not a particular plant is sensitive to phosphorus, the best action is to use a nitrogen-only or nitrogen plus potassium fertiliser at planting. The options are:
For nitrogen only: urea or sulphate of ammonia at 5 g/planting hole, well mixed into the soil and watered in.
For nitrogen plus potassium: The easiest option is to use Scotts All Purpose Slow Release Lawn Builder. It has the NPK analysis 32-0-8. Its supply of nitrogen will last for 3 months, which is plenty of time to get your plants established. This could be used at a rate of 10 g/planting hole.
An alternative is to use urea or sulphate of ammonia as above plus potassium sulphate at 3 g/planting hole.
If growth is poor with nitrogen only or nitrogen plus potassium, you can apply some fertiliser with a higher phosphorus content and observe what happens.
FERTILISER USE AFTER ESTABLISHMENT #
Apply fertilisers after establishment? Generally; no. Apply more if growth seems to be less than you think it should be, but be aware that some other part of the environment (too cold; not humid enough, too shady…) might be the cause of the poor growth. You might also apply a bit more fertiliser if you want rapid coverage of a trellis by a creeper. Otherwise, applying more fertiliser will probably just mean more work for you in hacking back over – exuberant growth created by ample water plus ample nutrition.
This recommendation assumes that you applied some organic mulch to the area after planting, and that you leave all of the shed leaves and twigs to add to that mulch. Recycling of nutrients from the mulch will provide all the ongoing nutrition your plants need – just like in the bush. This recycling will be particularly useful if you have included some leguminous plants in your garden. Their leaves are much richer in nitrogen than are the leaves of non-legumes.
NUTRIENTS OTHER THAN NITROGEN AND PHOSPHORUS #
Nutrients other than nitrogen and phosphorus
You will have noticed that I have so far discussed only two plant nutrients – nitrogen and phosphorus. What, you might be asking, about all the other four major nutrients and the 8 trace elements?
The other major nutrients are potassium, sulphur, calcium and magnesium.
Our native plants are able to get enough potassium from any soil that has a modest amount of clay. Only on deep sands might there be a need to provide extra potassium. Any controlled-release fertiliser applied at planting will have supplied more. It is unlikely that your plants will need more, unless you repeatedly trim them back and remove the trimmed foliage.
Many South Australian soils contain a good supply of sulphur, in the form of calcium sulphate (gypsum) that is naturally present in them or has been added. A light application of gypsum (100 g/m2) every couple of years will provide more ‘just in case’ there is not enough present. If you are irrigating with any tap water or water from a dam or bore, you will be adding more (sulphate)-sulphur at each irrigation.
Our plants can get plenty of calcium and magnesium from almost any soil, so long as the pH is above about 5.5. Even though the proportions of calcium and magnesium can be very different from soil to soil, native plants will be able to choose what they need.
There is one extra thing that can be mentioned about calcium. If you notice that your soil tends to form a crust on drying after rain, chances are that it has too much sodium in relation to calcium. Future crusting can be prevented by applying gypsum (calcium sulphate) to the soil. The extra calcium will displace sodium from the soil clay, so that it can be washed deeply into the soil. Apply about 500 grams per square metre.
TRACE ELEMENTS #
Finally, we come to the trace elements. The trace elements that are essential for all plant growth are: Iron (Fe); manganese (Mn); copper (Cu); zinc (Zn); boron (B); molybdenum (Mo); chlorine (Cl) and nickel (Ni).
We can ignore nickel and molybdenum. There has never been a report of deficiencies of these elements in native plants growing in soils. We can also ignore chlorine (actually chloride) because there is buckets of it in our soils and irrigation water. We can also ignore zinc and boron, as again, so far as I am aware, there has never been a report of deficiencies of these in native plants growing in soils. In fact, in urban areas, the constant rain of zinc particles from rubber tyres will provide more than enough.
Copper is a difficult one. There have been reports of copper deficiency in eucalypts being established on farm land. This deficiency is caused by a high concentration of phosphorus in the soil from the application of phosphatic fertilisers to crops or pastures. I have no idea what might happen to other native plants in an urban garden. My guess is that it is of minor concern, mainly because when irrigation water is supplied through copper pipes and brass fittings, it dissolves some copper that is then added to the soil during irrigation. I think that for most urban gardens there is little likelihood of copper deficiency, unless your soil has had super-high applications of phosphorus.
 Both iron and manganese deficiencies may be produced in native plants that are being grown in a soil whose pH is much higher than those on which the plants grew naturally. These deficiencies show up as yellowing of young leaves. Iron deficiency is far more common than manganese deficiency. There is no point in adding any iron sulphate or the iron chelate FeEDTA to the soil as the lime in the soil will just take the iron out of circulation. This comment applies equally to the tiny amounts of iron that are often included in mixed fertilisers. You might get a bit greening from the iron chelate FeEDDHA (sequestrene), but really, the best action is to replace the plant with one from an alkaline soil area. However, if you really want to grow this particular plant, you should be able to green it up by augering or digging holes into its rootzone, to a depth of about 300 mm, and stuffing a potting mix-iron sulphate mixture into the holes. (1 cupful of iron sulphate to 9 litres of potting mix). The iron in this mixture is isolated from the lime in the soil and so provides an ongoing source of iron to plant roots.
SOIL ANALYSIS #
There are many laboratories that offer analyses for soils. They are almost all geared to providing these analyses to farmers. They are typically unable to offer interpretations for native plants. Anyway, as I have written above, most of the analytical data you would get are of no use for native plants. The only number that can be useful is one for ‘available’ phosphorus. The ‘available’ description refers to availability to crop plants such as wheat and potatoes, etc. All native plants are able to get phosphorus from soils that do not contain enough for crops.
I urge all those who want to grow phosphorus-sensitive to get their soil (or soils, if there is variation across your garden) analysed for available phosphorus. There are several analytical methods in common use. They are named Olsen, Colwell, Bray and Mehlich III, after the scientists who developed them. To keep it simple, I suggest that you ask for the Colwell test. The concentration of Colwell-extractable phosphorus should be less than 10 mg/kg for very sensitive plants and less than 30 mg/kg for those that are moderately sensitive. The many native plants that are not sensitive will manage (like grow luxuriantly) with much higher concentrations.
You need to sample your soil carefully if the analysis is to be useful. Take about 20 samples from the area for which you need information. Each could be to a depth of 150 mm. Mix together these samples and then take a subsample for sending to the laboratory. Their instructions will tell you how much they need. If you dry the sample yourself (at air temperature, and certainly at no higher than 40oC) and then sieve it through a kitchen sieve with (roughly) 2 mm holes, you will not be charged for preparation. There is no need to pay for interpretation; use the numbers above.
If you think that different areas of your garden could have different phosphorus contents, you would need to take a separate sample from each area.
I suggest either of these laboratories.
Australian Precision Ag Laboratory (APAL ), 489 The Parade, Magill 5072; Tel. 8332 0199; see their website for instructions and much information about their tests for soil phosphorus.
CSBP Laboratory, 2 Altona St, Bibra Lake, WA 6163; Tel. 08 9434 4600. See their website for price and detailed instructions.


